
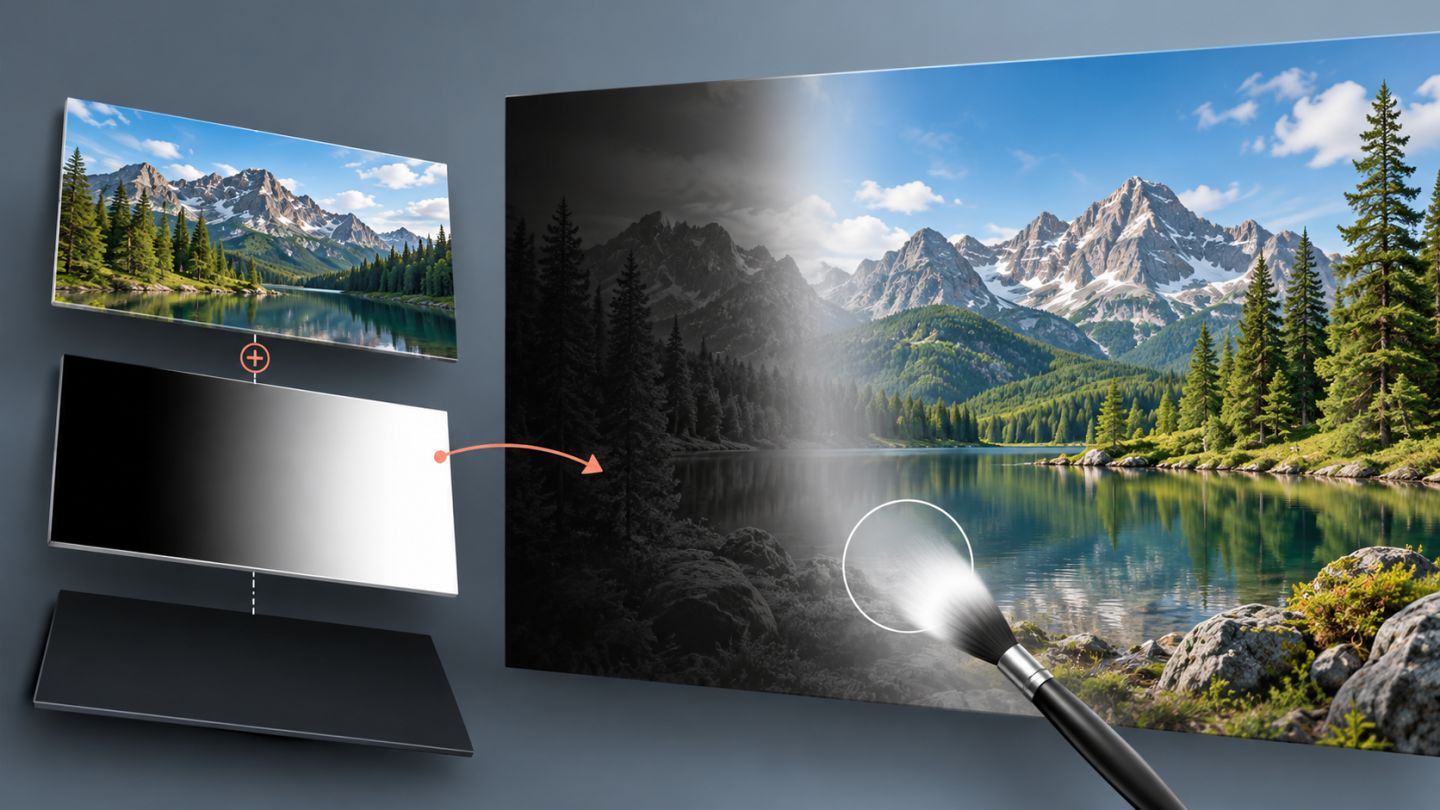
A layer mask controls which parts of a layer are visible without deleting the original content. It is fundamental to background removal, compositing, and local color adjustment.
White, black, and gray
| Mask value | Result |
|---|---|
| White | Fully reveals the layer |
| Black | Fully conceals the layer |
| Gray | Partially reveals it according to brightness |
Check the white border around a thumbnail to confirm whether you are editing layer pixels or the mask. Many mistakes happen because the Brush targets the image thumbnail.
Create masks in three ways
- Without a selection, Add Layer Mask creates a white mask.
- With a selection, it reveals the selected area and conceals the rest.
- Alt/Option-click Add Layer Mask to begin with a black mask.
Paint on a mask
Select the mask and paint black to conceal or white to reveal. Match brush hardness to the boundary: hard for crisp products and soft for light transitions. Lower Opacity or Flow to build a gradual effect.
Press X to swap foreground and background colors. Alt/Option-click the mask thumbnail to view it alone, or Shift-click to disable it temporarily.
Density, Feather, and Invert
- Density reduces the mask's overall strength.
- Feather softens its edge non-destructively.
- Invert swaps revealed and concealed areas.
Unlink for independent movement
The chain icon makes the layer and mask move together. Unlink them to reposition an image inside a fixed masked frame, such as a portrait crop or a texture inside type.
Adjustment and group masks
Every Adjustment Layer includes a mask. Paint black on it to limit a color or tone change. A group mask controls several layers together when an entire composition must share one boundary.
Useful advanced techniques
- Load an active selection into a mask for a precise starting point.
- Alt/Option-drag a mask thumbnail to copy it.
- Use a gradient on the mask to blend images smoothly.
- Apply Levels to the mask itself to increase edge contrast.
- Combine a broad group mask with detailed masks on individual layers.
The correct mask edge depends on the subject. Hair, metal, shadows, and mist should not share the same softness.
Apply or delete?
Deleting a mask can restore the complete layer. Applying it converts the mask into a permanent pixel change and discards concealed content. Apply only after preserving an editable version.
Practice exercise
Stack two landscape photos. Add a white mask to the upper image, blend with a black-to-white gradient, and repair the horizon with the Brush. Add a Curves Adjustment Layer and use its mask to brighten only one region.


No comments yet. Be the first to share your thoughts.